This free crochet ghost pattern is sure to make your Halloween projects extra spooky, and extra kawaii! I can’t get enough of this little guy, look how cute he is! It’s so fun to add to a bunch of different crochet projects. Every spooky season, I bring these little guys out to give my house some cozy and scary vibes!
The best part about this pattern? It’s no-sew! We will just work the ghost in the round and then embroider on the cute little face.
I actually based this ghost design off of one of my favorite vector decorations that I created for my other digital shop. It’s so cool to see my digital art come to life through crochet! I’m very happy with how this design came out and I feel like it looks a lot like my vectors.
Ever since I was a kid, my favorite holiday was Halloween. I love the smells, the aesthetics, the weather, (and the pumpkin spice lattes) during Autumn. I’m in my happy place when I’m creating Halloween themed crochet designs which is why I’m so excited to share this one with you all!
The yarn weight that you use for this project will change the size of your ghost. I like using a super fine size 1 yarn weight for this project because I wanted my ghost to be small.
With this in mind, you can use any type of yarn that you would like. I used 100% cotton for this project and I love how it looks!
Click the image above to save this pattern to your Pinterest board for easy access any time!
Step-by-step guide on Youtube
More of a visual learner or feeling stuck? All of my free patterns have a Youtube video tutorial! I show you how to crochet it step-by-step. Check it out here!
✂️ Materials
✦ super fine weight 1 cotton yarn
✦ 2.25mm hook
✦ scissors
✦ darning needle
Here is a link to the yarn that I used for this project: Hobbii, Friends Cotton 8/4
I used the following colors; white (01), lavender (73), and rose (44).
📔 Abbreviations
Written using US crochet terminology.
rnd: round
mr: magic ring
st: stitch
sl st: slit stitch
ch: chain
sc: single crochet
inc: increase (place 2 sc into 1 st)
hdc: half double crochet
dc: double crochet
**: repeat instructions between asterisks as many times as directed
( ): work the stitches in parentheses in the same stitch.
yu/yo: yarn under, yarn over
✏️ Pattern notes
✦ Use yu/yo sc.
✦ rnd 2 – rnd 16 begin each rnd with a ch1, end each rnd with a sl st to the first sc.
📄 Pattern
Rnd 1: 6 sc into mr
Rnd 2: inc in each st around (12)
Rnd 3: *1 sc, inc* rep x6 (18)
Rnd 4: *2 sc, inc* rep x6 (24)
Rnd 5: *3 sc, inc* rep x6 (30)
Rnd 6-10: sc around in each st (30)
Embroidery
I like to begin my embroidery at this point, you may do yours at the end if you prefer. Check out this timestamp in my Youtube video if you’d like to see how I did it.
Place embroidery in the following places:
✦ eyes on rnd 8, on st 12 & 17
✦ mouth on rnd 9, on st 15
✦ cheeks on rnd 10, the left side on st 12 & 13, the right side on st 17 & 18
To secure the yarn you can tie knots, glue them, or do both.
Finishing up
Rnd 11-15: sc around in each st (30)
On rnd 16 I no longer use yu/yo, I just yo for each st.
Rnd 16: *(sc, hdc), (2 dc), (hdc, sc), sl st, skip 1 st* rep x6, ch 1 and fasten off, weave in end.
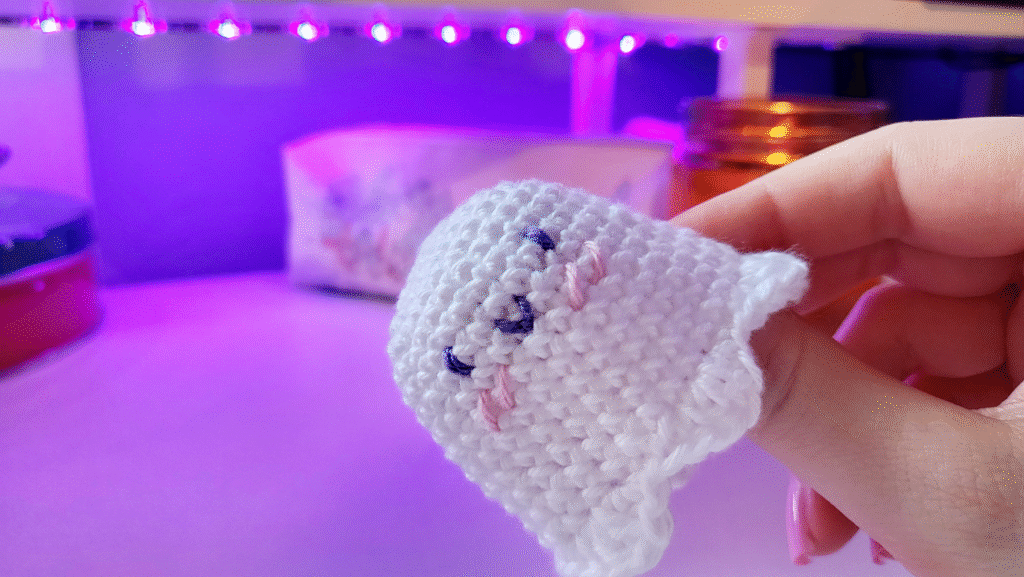
You now have a super cute ghost! I hope you had a spooky good time crocheting this. Until next time, byyyyye. ♥