This time I am here to teach you how to crochet flat circles with any stitch! With this tutorial you will learn to work in the round so you can make a circle that comes out perfect every time! With these tips it should be a piece of cake to make perfect circles, no matter what stitch you’re using. Not only is my goal to teach how to crochet cute things, but I also want to show you crochet techniques so that one day you can create your own crochet designs.
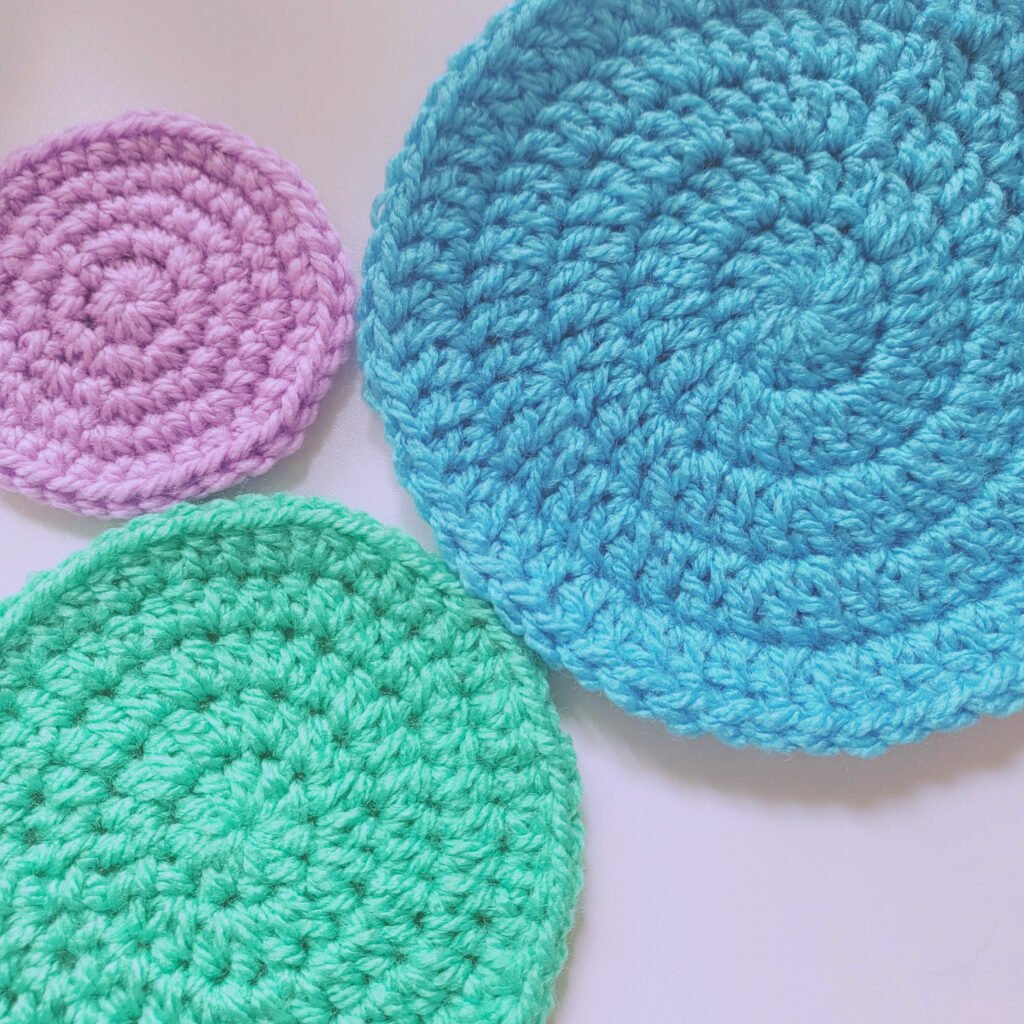
Crocheting flat circles is an extremely useful and fundamental skill to learn in crochet. You would be surprised at how often you’ll need to make a circle when you are crocheting. It will help you create things like amigurumi, hats, bags, and a lot more.
Click the image above to save this post to your Pinterest board for easy access any time!
Step-by-step guide on Youtube
More of a visual learner or feeling stuck? You’re in luck, I have a Youtube video tutorial where I demonstrate how to do this step-by-step.
📔 Abbreviations
Written using US crochet terminology.
mr: magic ring
st: stitch
sl st: slit stitch
ch: chain
sc: single crochet
hdc: half double crochet
dc: double crochet
tr: treble crochet
**: repeat instructions between asterisks as many times as directed
How to crochet flat circles
Recommended number of stitches to begin with
Each crochet stitch has a recommended number of stitches to begin with in round one. Of course, you can start with whatever number you would like but generally speaking these numbers work very well.
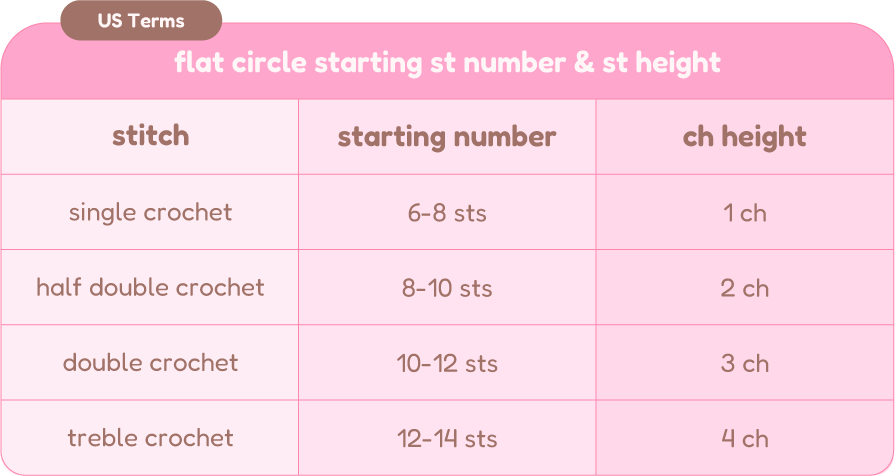
The yarn weight you’re using and hook size could effect your circles and these recommended numbers.
The chart above also includes the chain height for each stitch. Each stitch is equal to a certain amount of chains in height. Therefore, these are how many chains you will begin your rounds with to give you enough height.
No matter what stitch and starting number you begin with, to create a perfect circle you will always follow the same pattern. Making it super easy to remember for any project without having to do any math!
Always remember to count your stitches at the end of every round. If you want a perfect flat circle you will need to have the correct number of stitches in each round.
Round 1
You will always begin by creating a magic ring. If you don’t know how to create a magic ring, please refer to my video where I teach you how, step-by-step!
At the start of each round, chain the height of your stitch. I’ll be using half double crochet as my example so in this case, I would ch 2 as that is how many chains a hdc is in total height.
Work the recommended number of stitches into the mr depending on which st you are using. Since I’m using hdc, I’m going to place 10 hdc into the mr as the recommended amount of starting stitches for hdc is 8-10.
There are many different ways to close rounds. For this example we will keep it simple and just sl st to the first st to close the round.
Round 2
At round 2 we will now begin increasing. Each round we want to increase by the number of starting stitches. So if your starting number is 10, you will preform a repeating pattern 10 times. Round 2 is very simple, you just repeat in every stitch around. You should always have double the amount of stitches you began with in round 1. So if we began with 10 stitches, we should have 20 total stitches by the end of round 2.
Round 3
Round 3 is where you will see our repeating pattern begin. It starts by repeating *1 st, inc* rep times the number of starting stitches around.
For example, Since I started with 10 st, will do *hdc, inc* repeating that pattern 10 times.
Round 4
Here is where you will start to notice the pattern. In round 4 we will repeat the following pattern around *2 st, inc* rep times the number of starting stitches around.
Mine will look like this; *2 hdc, inc* rep 10 times.
Round 5 & beyound
Every round you will just keep adding to this pattern until you reach your desired diameter. In round 5 the pattern is *3 st, inc*. In round 6, *4 st, inc*, and so on. Increasing how many stitches you do before the increase by 1 each round.
Growing your circle perfectly is so easy with this method. Just remember how to do this pattern and pin this blog post so you can refer back to it any time! I absolutely love how simple it makes creating circles and not having to figure out any math is such a huge bonus for me.
Thank you all so much for reading, I really hope this information was helpful. Until next time, byyyyye. ♥